
Floating & Fluttering for FMS468

Floating & Fluttering for Freshly Made Sketches
Today I am playing along in the Freshly Made Sketches Challenge 468. They offer up a sketch idea, and then we as paper crafters create a project inspired by that sketch! Here is the Sketch Idea offered and it will link you back to their blog to see all the other creations created as well.

I decided to create with the new Floating & Fluttering stamp set and coordinating dies. I also pulled in a sample piece of the Fine Art Floral DSP. I wanted something bright but also wanted to show off these fabulous new butterflies we have to offer. Since this set has no sentiments, I also used the new Happy Thoughts stamp set.
Take a look at my Stampin’ Show & Tell video tutorial, and watch as I go through the creative process. This is a lovely 2-step stamping set, where we can stamp the outline image and then stamp the full color of the image with a second stamp. Then see the full tutorial with the supply list below in this post.
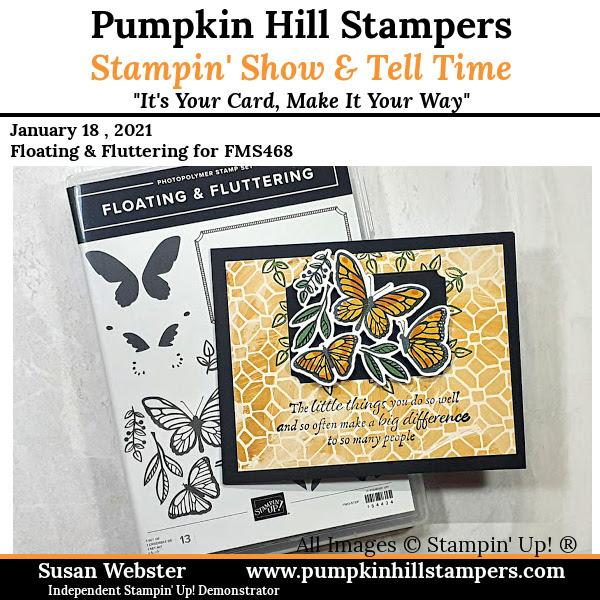
So are you inspired by this fun project? I just love the brightness of the colors and the way the pattern in the Fine Arts Floral DSP coordinates with the outline images of the butterfly.
Floating & Fluttering Tutorial

Supplies:
Stamp Sets –
- Floating & Fluttering [154424]
- Happy Thoughts [154507]
Card Stock –
- Basic Black [121045]
- Fine Art Floral DSP [154558]
- Basic White [159276]
Stamp Pads –
- Bumble Bee Classic Ink [153116]
- Pumpkin Pie Classic Ink [147086]
- Garden Green Classic Ink [147089]
- Memento Black Ink [132708]
Misc -
- Fluttering Dies [154318]
- Stampin’ Cut & Emboss Machine [149653]
- Stampin’ Seal
- Dimensionals
Measurements:
- Basic Black Card Base 11 x 4 ¼ [scored at 5 ½]
- Patterned Paper 5 x 3 3/4
- Basic Black Label 2 ½ x 3 ½
- Basic White 3 x 3 ½
- Basic White 4 x 5 ¼
Instructions:
Stamping
-
Stamp your image with Memento. Let dry before adding color.
-
Fill the image with color using the full body image with Bumblebee and the detail stamp with Pumpkin Pie.
-
Repeat with Garden Green ink for the leaf images.
-
Stamp your sentiment with Memento onto the bottom of the patterned paper.
-
Also stamp the inside panel of your card.
-
You will use the Garden Green ink again, and stamp behind and around the placement of your Basic Black label, on the front of your card.
Die Cut Layer
-
Using the Fluttering Dies, die-cut the image from the Basic White cardstock.
-
Also die-cut a label from the Basic Black cardstock.
Put it All Together
-
Now just layer your panels onto the front of your card and inside.
-
I did use dimensionals to pop up the butterfly die image.