Pretty Pumpkins - I'd Pick You!

Pretty Pumpkins - I'd Pick You!

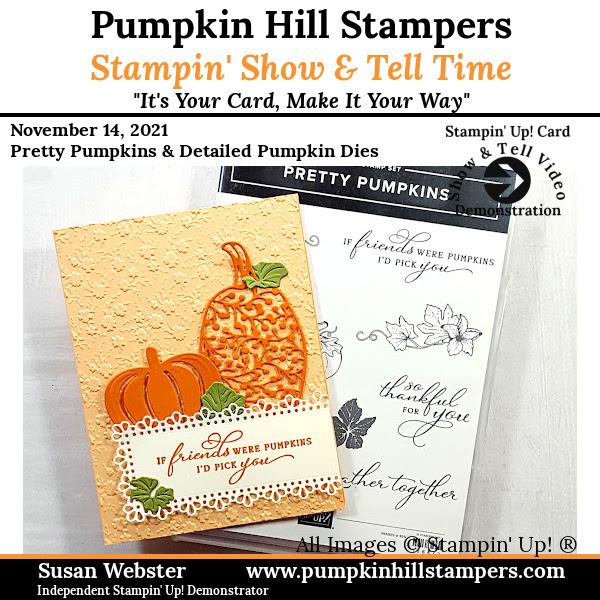
Today I am sharing this fun pumpkin project featuring the Pretty Pumpkins Stamp Set and coordinating dies Detailed Pumpkins.
At first I thought of doing a mono-chromatic card creation with just the Pale Papaya and Pumpkin Pie colored cardstock, but in the end I wanted the leaves too, so I added the Old Olive embellishments.
I just love how easily this card came together. Simple Stamping of the sentiment followed by some selective die cutting for the label. Then easy peasy die-cutting of the detailed pumpkins and wonderfully embossed leaves. I added some dry embossing with the Ornate Floral embossing folder to soften the card front. Layer it all together and you have this project.
Here's the tutorial and list of materials I used. But remember, this layout could be CASED, just use your own dies and follow along. Check out the quick video tutorial I post at the end here as well.
Happy Stamping,
Susan
Supplies List - Shop Online 24/7
Stamp Sets:
- Pretty Pumpkins 156472
Ink:
- Pumpkin Pie 147086
Paper:
- Pale Papaya 155776
- Pumpkin Pie 105117
- Old Olive 100702
- Very Vanilla 101650
Accessories:
- Stampin’ Trimmer 152392
- Bone Folder 102300
- Simply Scored Scoring Tool 122334
- Stampin’ Cut & Emboss Machine 149653
- Ornate Layers Dies 152726
- Detailed Pumpkin Dies 156477
- Ornate Floral Embossing Folder 152725
- Dimensionals 104430
- Mini Glue Dots 103683
Instructions:
-
Cut an 11“ x 4 ¼ “ piece of Pale Papaya cardstock. Score at 4 ¼”. Fold in half to form a card base. Burnish crease using a Bone Folder.
-
Emboss card front with Ornate Floral Embossing Folder.
-
Stamp sentiment with Pumpkin Pie ink on Very Vanilla cardstock. Sized to fit with extra cardstock for die-cutting the label. Use the Ornate Layers Die to die cut, leaving one end trimmed off.
-
Die-cut two pumpkins from Pumpkin Pie cardstock with the Detailed Pumpkin Dies.
-
Die-cut three leaves from Old Olive cardstock with the Detailed Pumpkin Dies.
-
Assemble the card.
-
First the sentiment with dimensionals. Lift it up to be able to position pumpkins behind.
-
Add pumpkin dies with glue dots and dimensionals.
-
Add leaves with glue dots.
-