
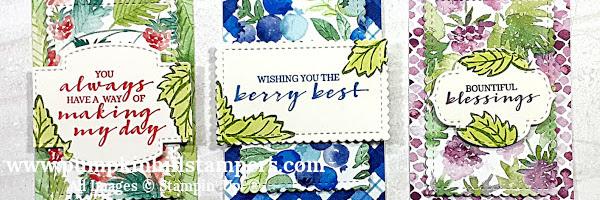
Wishing You the Berry Best for 3rd Thurs Blog Hop

Welcome to the 3rd Thursday BLOG HOP for February 2021. Those of us who love our Stampin’ Up! products are still enjoying the first Sale-a-bration promotion for 2021. Yes I said first Sale-a-bration for 2021, Stampin’ Up! will be having another one mid-year.
So this month I have a product that features my absolute favorite Sale-a-bration product, the Berry Blessings Bundle. You can add this item to your order once you have spent $100. I know that is a big order, but I know we all get there fairly easily!

So the Berry Blessings Bundle included the stamp set Berry Blessings and the patterned paper Berry Delightful DSP. It also coordinates rather nicely with the Sweet Strawberry bundle found in the Spring Mini Catalog. Gotta love coordinating products!

Okay, so I do have a Stampin’ Show & Tell video tutorial to share with you today as well. I will take you through my two-step crafting process. First I will create the ATC cards, which work well as sentiment tags and embellishments for our projects. Then I will show you how easy it is to make them into full-sized cards. Then you can see the full tutorial with the supply list below in this post.

Well, that was easy! First think about crafting some ATC cards. Whether you want to trade them with your crafting friends or keep them to use on your own projects. Then use that coordinating color cardstock and scrap patterned paper to make full cards.
Now that you have visited with me, and I hope my project may have inspired you, it’s time to send you along to the next blog with Susan Reitmeyer Legits. Please leave me and the other paper crafters comments on our posts. We just love to know what you think of our ideas.

BLOG ROLL CALL
Susan Webster - YOU ARE HERE
WISHING YOU THE BERRY BEST TUTORIAL

Supplies:
Stamp Sets –
- Berry Blessings [155276] - Sale-a-bration Set 2021
Card Stock –
- Poppy Parade [119793]
- Pacific Point [111350]
- Blackberry Bliss [133675]
- Berry Delightful DSP [155224] - Bundled Item with Stamp Set (SAB)
- Shimmery White [159276]
Stamp Pads –
- Poppy Parade Classic Ink [147050]
- Pacific Point [147098]
- Blackberry Bliss [147092]
- Granny Apple Green [147095]
Misc -
- Stitched So Sweetly Dies [151690 ]
- Stampin’ Cut & Emboss Machine [149653]
- Water Painter Brushes [151298]
- Tombow
- Dimensionals
Instructions:
ATC Card
Measurements:
- ATC Card Size 2 ½ x 3 ½
- ATC Patterned Paper 2 ½ x 3 ½
- Sentiment Label 2 ½ x 3 ½
Die Cut Layer
- Using the Stitched So Sweetly Die [rectangle that fits the 2 ½ x 3 ½ size], cut a full shape from the patterned paper, positioned in the center.
- Reserve both parts of the die-cut paper.
- Die-Cut sentiment labels with the Stitched So Sweetly Dies as well.
Stamping
- Stamp your greeting with coordinating color ink.
- Stamp the leaf image on the edges of your sentiment tags with Granny Apple Green.
- Color the leaf with the Water Painter Brushes.
Construct ATC Card
- With Tombow adhesive glue, add a light layer of adhesive to the edge of your ATC card mount cardstock. [2 ½ x 3 ½]
- Now add the frame edge of the cut DSP to the mounting piece.
- Add Dimensionals to the die-cut rectangle portion and position back into the center of the ATC card.
- Add Dimensionals to the Sentiment Tags and add to the ATC.
Full Card
Measurements:
- Cardbase Size 8 ½ x 5 ½ [scored at 4 ¼]
- Patterned Paper 2 ½ x 5
- Add the 2 ½ x 5 section of DSP to the card front.
- Now add the ATC card for embellishment.