
Magic Slider Card with Color & Contour

Magic Slider Card with Color & Contour
Stamping With Friends Blog Hop

|
|
|
|


Hello my stamping friends.
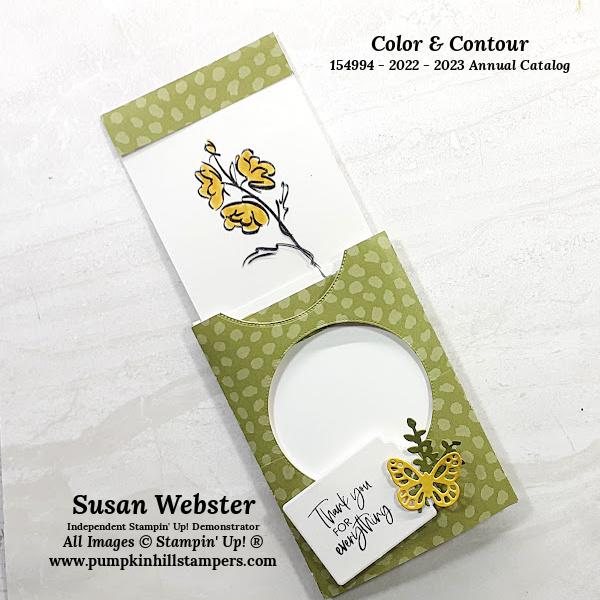
Do you know what a Magic Slider Card is? I had seen some in the past, but have never crafted one myself before this Blog Hop Challenge. So I got to learn something new. So excited to share my project today.
The idea behind the Magic Slide Card is that when you pull the insert out of the card, the black & white image is magically transformed into a color image. Yep, how did we do that? I’m gonna share what I learned.
So first off let me thank fellow demonstrator Lynn Dunn who had a tutorial posted online that helped me figure out how to make a project like this. This is why I share my tutorials as open source projects as well. So I can help and maybe inspire others with projects.
Here is my Stampin’ Show & Tell video demonstration for my project. This was only the second attempt at constructing one of these cards, so bear with me as I go through it, and the measures and instructions are below for more details if you need them. After watching, be sure to leave me comments either here on the blog post or over on YouTube. You can even subscribe to my YT channel if you want to see more of my videos!

YOUTUBE LINK
Okay, so there are the basics behind a Magic Slider Card, you need a card base with a divided section to slip the insert over. The colored panel behind the divider and a window sheet in front of the divider. Of course my project was a full card slider, but you could certainly do a small pocket slider as a card embellishment.
Now here are the links for the rest of the paper crafters sharing project today. Be sure to hop along the next projects and check out all our clever ideas. Comments are always welcomed, let us know you appreciate our projects and if we inspired you today.
Happy Stamping,
Susan
Project Tutorial
Base Card Construction with Divider Inside
1. From a 12 x 12 sheet of DSP, cut a 5 ½ x 12 inch piece and score at and 8 inches.
2. From the center section create a window with a die or paper punch.

3. Now cut a 4 ¼ x 5 ¼ inch piece of Basic White cardstock and score at ⅜ inches along the 4 ¼ inch side. So you end up with a section that is 3/8 x 5 ¼ inch flap. This is the center divider for the card.
4. Open the DSP and lay it flat, face down on the table. Fold the two sides in and see which way they overlap and lay the flattest. This is how you want to have your card folded when you are done.
5. Re-open the card base and position the divider section over the die-cut window. Have the ⅜ tab pointing up. Position it along the crease line. Add adhesive to the ⅜ tab and then fold the 4 inch DSP panel closed to adhere the divider section.
Slider Section
5. Cut a 3 ½ x 5 ¼ inch piece of Basic White cardstock
6. Cut a 3 ½ x 5 ¼ inch piece of Window Sheet.
7. Using the Stamparatus, position the image so that it will stamp in the open window of your card base. Mark on the grid sheet of your Stamparatus where the corner of your cardstock is positioned as well. You need to place the Window Sheet in the same exact spot.
8. Now with Stazon Ink, stamp the image on both the Basic White cardstock and then again on the Window Sheet panel. (EXACT POSITIONING IS KEY HERE)
9. Overlay the window sheet onto your stamped Basic White panel, check your images. If they are not exactly the same, either trim them down or try again.
10. Now add color to the Basic White panel.
11. Make a hinge for the pull out of your card. Mine was a 3 ½ x 1 ¾ section of matching DSP. I then scored it to be 3 ½ x ⅞. Then adhere the window sheet edge to the top section and the cardstock panel to the back section. This allows the slider to go in front of and behind the divider inside the cardbase.
12. Now on the Window Sheet panel only, add a bottom edge. Cut a DSP panel that measures 4 x 1 ¾. Score at ⅞ and this time adhere it on both sides to the Window Sheet.
Assembling the Slider Card
13. Start by opening the base again so it is laying face down on the table.
14. The divider section should be open.
15. Then add small Dimensionals to the opening end of the cardbase where the slider will pull out. These will create a bumper for that bottom edge to stop against. I trimmed small rectangles from the edge of my dimensional sheets.
16. Now lay the window sheet panel of the slider down on the window opening, Hinge the Basic White cardstock section up, so the hinge is open.
17. Now close the Divider section over the window sheet and adhere with just the dimensionals.
18. Close the Basic White panel of the slider over the back side of the Divider section.
19. Now close the one side of the cardbase, but do not add adhesive. We want all the parts of the slider to be adhesive free.
20. Now add adhesive to the last panel of the DSP card base and adhere the card closed. This basically makes a pocket card base, but it is open on both ends.
Supplies List - Shop Online 24/7
|
|
|
|
|
|
|
|


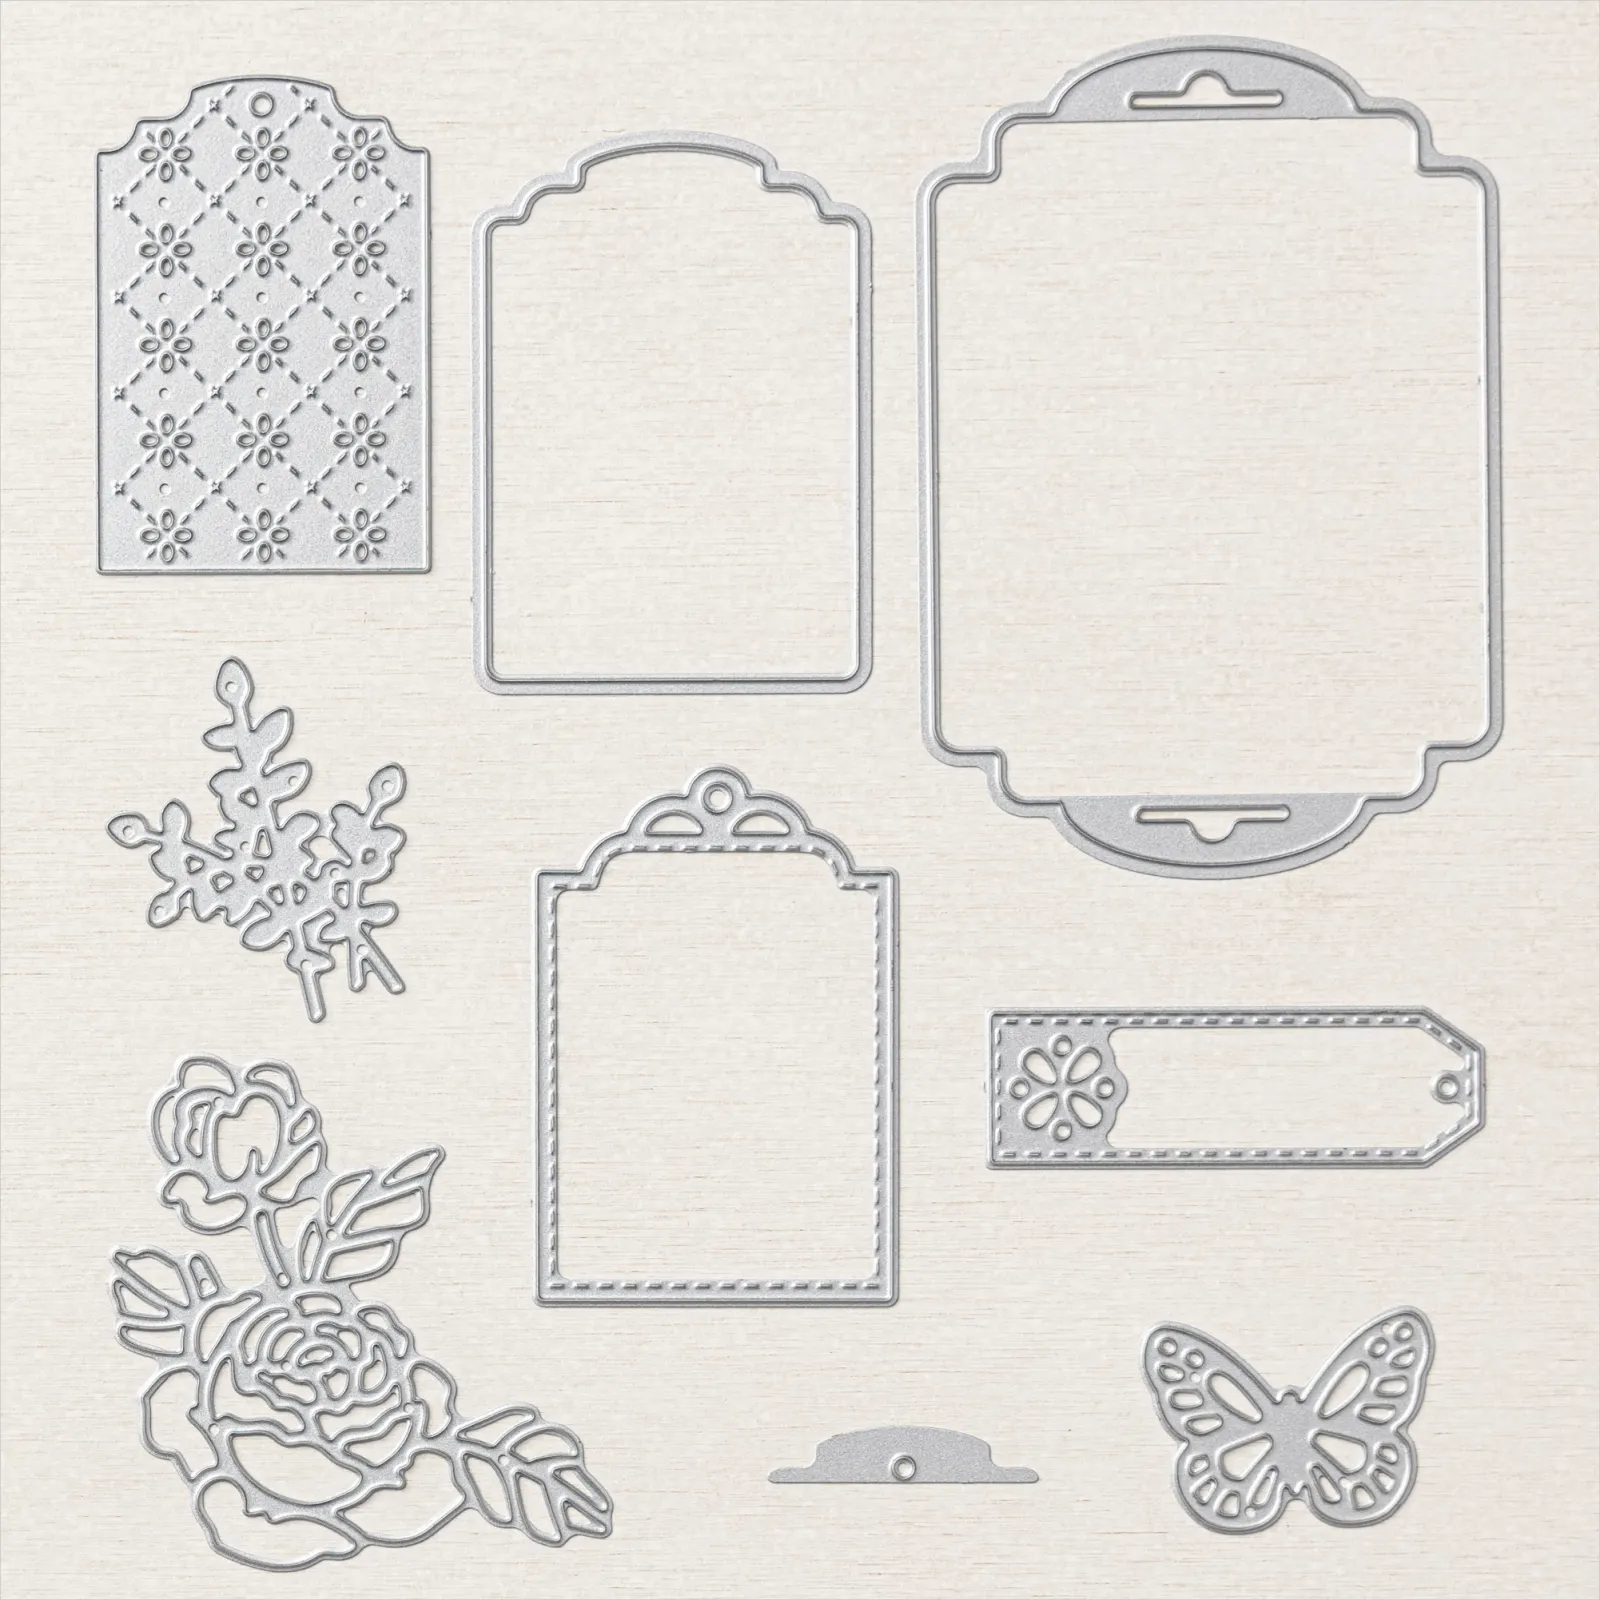

Ink: Stazon Black, Daffodil Delight Stampin’ Write Marker
Paper: Basic White, Old Olive, Daffodil Delight, Design A Daydream DSP
Tools: Stampin’ Trimmer, Bone Folder, Stampin’ Cut & Emboss, Stamparatus
Adhesive: Multipurpose Glue, Dimensionals, Mini Glue Dots
Check out my MONTHLY FUN FOLD CLASS!
Here are a couple of projects that might interest you. These have been featured in my Fun Fold Template Class. Each will take you to the project post. Or visit the Mo Fun Fold Template Class page for more information. You are welcome to join us anytime.
|
|
|
|


Remember to leave me a comment, ask a question or subscribe to my newsletter to see more of my projects. Thanks for visiting my project today.
Susan Webster
Pumpkin Hill Stampers
Independent SU! Demonstrator
Your Creative Coach since 2005
EMAIL: susan@pumpkinhillstampers.com
|
|
YOUTUBE (subscribe to channel) |
