
Thank You Project | JOS November BLOG HOP


Thank You | JOS November BLOG HOP
A simple “thank you” can spread so much appreciation, joy, and recognition. I often say thank you to my grocery store clerk, bank teller, post office clerk. But maybe I don’t say thank you enough to my friends, family, and followers. When we don’t see each other face-to-face I think it might just slip away a bit. But, it’s so important!
Today the Joy of Sets crafters are all sharing projects focused on saying “Thanks”. I hope you enjoy my project and all the others. Remember, we all love that you visit our blogs, please leave us comments to let us know our projects inspire you.
Thank You Project | JOS November BLOG HOP
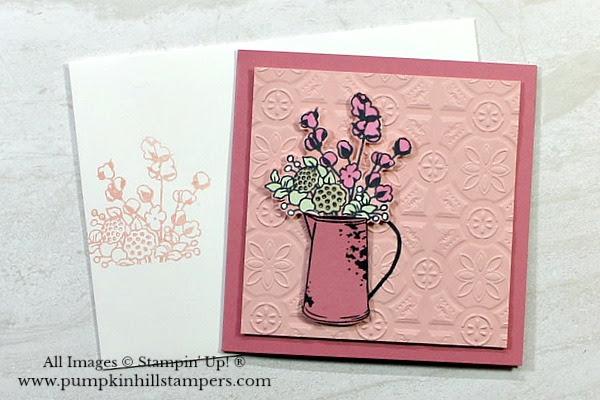
Here is my project for today. It’s not your typical sized card for the States, but it will fit in our standard sized envelope. This card measures 4 1/4 x 4 1/4 inches. It didn’t start out this way though. But when I crafted the front panel with this embellishment, it just felt like too much space around the focal point. So I trimmed it all down to be a square card. Remember, there are no rules in paper crafting. Just craft the way it makes you happy! I tell my stamping friends…
“It’s your card, make it your way!”
Project Breakdown

As you see, I chose to use the Country Home stamp set for my project today. I also used the coordinating embossing folder, Tin Tile to create a textured background to host the main embellishment.
Here is a look at the front and inside together. You can see that I used a bit of the trimmed off original front embossed panel to embellish the inside. No reason to let it go to waste! I also stamped the flowers again on the inside to fill the space. The flowers were stamped with Blushing Bride and the sentiment with Rococo Rose.


Time for a CLOSE UP look at the focal image on the front of the card.
To start I stamped with my Memento Ink. Then I colored with my BLEND markers. [Soft Seafoam, Crumb Cake and Rococo Rose] Then I used my paper snips and trimmed it all out! But if you look carefully, you may notice that the edges where I did the fuzzy cutting are not white. I used my Blushing Bride marker to color all the white space around the edges and between the images where I could not trim with my paper snips. I wanted it to all blend into the background embossed panel.
Now take a look at the pitcher image. First,I stamped it on the Blushing Bride panel before I embossed it. Then stamped it again on Rococo Rose and trimmed it out, eliminating the handle. Finally, when it all got added to the image, the handle from the image below completes it again.
Well, that wraps up my project. I hope my tips and tricks of paper crafting help you in your own projects. Or maybe you were inspired to try something new. I would love to have you leave me a comment, and let me know what you think!
Susan
JOS November BLOG HOP Continued…
Now it is time to send you along to the next BLOG, enjoy the project presented by Rochelle Laird-Smith. I know I also enjoy her projects, along with all the other Joy of Sets Blog Hoppers!

November 2020 Blog Roll
Susan Webster – YOU ARE HERE